Roll it

My husband and I went on vacation to beautiful northern Michigan, specifically the west side of the state. It is a gorgeous place with lots of scenery, great weather, and great food. We spent some time with family, including our aunt who has celiac disease. She is always experimenting and making these terrific, gluten-free items. She mentioned to me that she made some bread using King Arthur Gluten-Free Bread mix and that she wanted to use the same dough and try to make cinnamon rolls. Naturally, I was game.

What is wonderful about King Arthur gluten free flour is that is available in most grocery stores across the US, and available to purchase online. It was also extremely easy to make. That’s very convenient for someone on vacation with limited room to bring all their gluten-free cooking supplies!

See the recipe below for how we turned this bread into cinnamon rolls! But first, enjoy the picture:

rolltwo

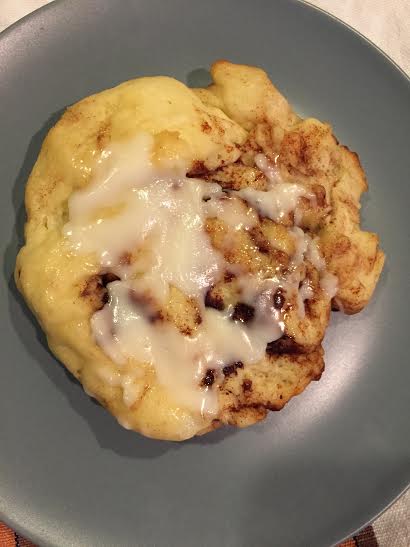
GLUTEN FREE GLAZED CINNAMON ROLLS
makes 12-14 rolls

Ingredients:
1 box of King Arthur gluten free bread and pizza mix
4 tbsp of butter or coconut oil, melted
1/2-1 tbsp cinnamon
1/8 c. brown sugar
1/8 c. white sugar

ICING
2-4 tbsp of non dairy milk (or regular milk)
2 tbsp of confectioners sugar
1/2 tbsp of butter or coconut oil, melted

Instructions
1. Prepare the bread mix according to the package instructions. Preheat your oven to 350F.
2. After bread has its first rise, punch down and mix lightly.
3. Place two large sheets of plastic wrap or wax paper on a flat surface. Spray both sheets generously with cooking spray.
4. Place bread dough on the plastic wrap or wax paper. Using your fingers, spread dough out into a 9×13 rectangle. Dough will be very, very sticky, so frequently moisten your fingers in a bowl of warm water to help with spreading.
5. Brush butter or coconut oil over the dough. Sprinkle cinnamon generously over the dough. Sprinkle brown sugar and white sugar generously all over the dough.
6. Use the wax paper/plastic wrap to assist you in rolling the dough into a cylinder, by holding the vertical corners of paper/plastic and gently rolling it toward you. Be very, very careful in this process to get the most uniform roll possible. You’re probably going to get some seepage of dough out of the wrap. This is fine. You can separate it from the rest of the roll and use it to make a cinnamon biscuit.
7. Using a serrated knife, cut dough into 1 to 1 1/2 inch slices. You may need to run knife through warm water occasionally to help.
8. Using a spatula, transfer the rolls to a lightly greased cookie sheet. The rolls may spread a little bit, so after moving all the rolls, use your damp hands to lightly reshape.

rollone
Rolls rising…see how big they get!

9. Spray wax paper or plastic wrap with cooking spray, cover cookie sheet, and let rise for 20 minutes.
10. After rolls have risen, add to preheated oven and cook for 15-20 minutes. You may need a spatula to check the bottom of the rolls to determine if they are done. Once cooked, remove from oven and allow to cool for 10 minutes.
11. Meanwhile, mix the butter or coconut oil, confectioners sugar, and milk to desired icing consistency. You may need more or less sugar and milk than listed above.
12. After rolls have cooled for 10 minutes, add icing with a brush or simply pour over top. Serve!

NOTES:
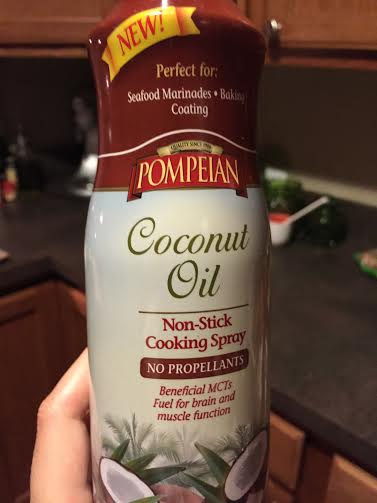
-I normally never use cooking spray for anything, because it can contain chemicals. However, for this recipe, it is absolutely necessary to use some sort of spray to make your plastic wrap/wax paper not stick to this dough. The dough is extremely sticky! If you feel squeamish about using cooking spray, you could make your own.
I purchased this brand from my local grocery store. It promises no propellants.
oil

-In this recipe, you can use all white sugar, or all brown sugar, or a combination of both. I prefer to use both, but I love a sweet cinnamon roll!
-Feel free to add nuts or raisins to your roll. Just prior to rolling, sprinkle them over your cinnamon and sugar mix.
-If you find the dough to be too sticky for your liking, you can add more gluten free flour of your choice. After letting the dough rise the first time, punch down and add 1-2 tbsp of other gluten free flour.
-These rolls do not come out perfectly shaped and they can be a challenge to work with because the dough is very sticky. However, they rise beautifully, much better than any other gluten free recipe I’ve tried.

Learning from a cook who makes gluten-free items all the time was great! She really taught me a lot about the best gluten-free flours, who makes the best mix for what purpose, and how to work with the dough. I hope you all have been having a great summer so far! If you end up making the cinnamon rolls, let me know how they turn out by adding your comment below!

No gluten, no beans, no problem

There are so many amazing foods out there that become inedible when you’re on low FODMAP, in particular breaded, fried food, and veggie burgers.

Why veggie burgers? Because they’re often full of soy and beans, which are “no-no’s” on the elimination diet.

Well, I’ve been tinkering with a few recipes that I thought I had to give up, and I’m finally ready to share them!

I wanted to make a classy meal for my husband and I, so I opted to alter Chicken Parmesan. Chicken Parmesan is this delicious breaded cheese laden dish. I didn’t want to coat the whole thing with gluten free flour or bread crumbs (see my previous post about my hatred for most gluten free baked products), and realized that almond meal could help make an amazing breading! Finally, a gluten free option for those of us who hate most gluten free products!

chickenparm

Chicken Parmesan
serves 4

Ingredients:
2 large boneless chicken breasts, filleted (you want to have 4 thin chicken breasts)
1 egg, lightly beaten
1/2 c. almond meal
1/2 c. gluten free flour
1/4 tsp salt
1/4tsp pepper
1 tsp Italian seasoning
1/8 c. fancy shredded Parmesan cheese
3/4 c. shredded mozzarella
1/2 c. marinara sauce (for low FODMAP option, I use this brand )
1 c. gluten free pasta

Directions:
1. Preheat oven to 450F. Line a baking sheet with parchment paper.
2. Mix almond meal, salt, pepper, Italian seasoning, and fancy shredded Parmesan in a wide, shallow dish. Place gluten free flour in its own shallow dish, and place beaten egg in its own shallow dish.
3. One by one, coat chicken breasts in gluten free flour, shake off excess.
4. One by one, dip chicken breasts in egg, let excess drip off.
5. One by one, coat chicken breasts in almond meal mixture, shake off the excess.
6. Place chicken breasts on prepared pan and cook for 20 minutes. Turn chicken over, cook for another 5 minutes.
7. Remove chicken from oven, and spoon 1/8 c. marinara sauce over each breast. Sprinkle with shredded mozzarella, and bake 5 minutes or until cheese is melted and bubbly.
8. Serve over pasta

NOTES: Both Parmesan and mozzarella are considered “hard cheeses” and are naturally lower in lactose. If you still find they are upsetting to you, you can use less cheese or substitute a lactose free cheese of your choice.

Another thing I miss about being low-FODMAP is the lack of veggie burger options. Most veggie burgers I encounter are made with soy, beans, or both. Most recipes for veggie burgers also include BEANS! I get it, they are a great binder and great source of protein, but they are intolerable for me. I do not tolerate beans well, so much in fact that I cut beans out about a year before trying the low FODMAP diet. I love sweet potato veggie burgers and decided to experiment!

Sweet Potato Veggie Burgers
serves 4

Processed with VSCOcam with f2 preset

Served with crackers, tahini dressing, and crudite

This recipe modified from this post: How Sweet Eats

Ingredients:

1 medium sweet potato, peeled and diced
1 bunch green onions, chopped (no white parts included)
1 garlic clove, smashed
1/2 c. cooked quinoa
1/4 c. almond meal
1/4 c. shredded Parmesan
2 tbsp. cilantro
2 tbsp. basil
pinch of cayenne pepper
1 tbsp. tahini
1 large egg, lightly beaten

Directions
1. Heat a large skillet over medium heat and add coconut oil to pan. When melted, add in sweet potato, green onion, salt, and pepper, stir, and cover for 10 minutes, or until potato is easily pierced by a fork. Remove lid and add smashed garlic clove, stir for 1 minute, and remove the garlic.
2. Transfer the potato mixture to large bowl and mash until smooth. Add quinoa, herbs, cheese, tahini, salt, pepper, and cayenne pepper, and mix. Once well mixed, add the egg, and mix well to combine.
3. Form the mixture into 4 patties. Heat coconut oil over medium heat in a pan.
4. Add veggie burgers and cook 3-4 minutes on each side, until golden brown.

NOTES: I really don’t like quinoa, and if you have an aversion like I do, you could make this with white or brown rice. My aversion has to do with quinoa texture, and I found when mashed into the burger, I didn’t really notice it very much.

There you have it! Two low FODMAP meals, both using gluten free options and bean free options!

YEAR ONE!

It’s hard to believe it’s been 365 days since I first began the FODMAP diet for IBS. What a weird yet tasty journey! Back in May 2014, I’d never heard of the low FODMAP diet, and was surprised to find so much information, recipes, and support out there! This diet went from troubleshooting to experimentation to lifestyle. It truly has changed my way of eating, living, and my way of thinking about food. I reflect on the diet that I had for over 30 years, and now it’s so obvious why it wasn’t working for me. Eating bread 3-4 times a day, eating high fat, high sugar sweets after every meal, reveling in garlic-filled EVERYTHING, etc etc etc…no wonder I felt like garbage most of the time!

I actually enjoy the diet now and have decided I’m not going to try the LEAP diet at this time. Between the LEAP restrictions and my FODMAP restrictions, it felt too confining, and for the the most part, I’m very happy with how my body responds to the FODMAP diet.

Here are some things I’ve learned since making the change to low FODMAP:

1. Just because it’s healthy, doesn’t mean it’s for you
This was one of the biggest “HUH???” moments for me when I started the diet. How could I be so sick? I eat broccoli, brussel sprouts, onions, garlic, pomegranates, and watermelon! I only consume low fat dairy! I stay away from most sugary drinks! When I eat chocolate, it’s dark chocolate! I only eat whole grains!! For one thing, as noted above, I tended to overindulge, even in the good things. For another thing, not everything that is healthy or a “superfood” is FODMAP-friendly. It went against everything I learned about health, digestion, and wellness. There are many, many healthy things a person can eat in abundance on a low FODMAP diet that are just as good for you, and that helped clear some of the confusion for me.

2. Plan and prepare, ALWAYS
I feel pretty fortunate that for the most part, if I wasn’t able to prepare all my meals for the day, I could usually find something at my job that was low FODMAP appropriate. But what a pain that was at times! Preparing and planning meals in advance was incredibly helpful. It helped me stay on the diet, and it helped me eat! My issue can be that if I don’t plan, and I have nothing to eat, I just won’t eat until I go home from work. Or if I didn’t plan dinner, I just ate eggs…again. While I love eggs, I don’t love eating them for dinner every night. Make a shopping list regularly, make time to go to the grocery store, make time to meal prep. This doesn’t all have to be done in the same day! It can be spread out over several days to feel less overwhelming. Eating well and eating enough are very important things, make time for them!

3. Stuff just kinda sneaks in
I’d be eating something that I’d had several times, with no issue. But suddenly, the food baby would start to grow, and I’d be horribly bloated and distended. Sometimes, things aren’t “safe”. And just be prepared for that! Carry your debloating, degassifying things with you. Things I made at home would be safe, but I can’t always control what a restaurant puts in their burger. I would assume it was safe, and then find out it wasn’t. Don’t feel bad if things just kind of sneak in on you, just prepare as best you can and take care of your body.

4. It’s OK if it’s not perfect
I did the entire FODMAP elimination process wrong. I found out that my rice blend that I used for sides and stir fry had barley in it, a big “no no” in FODMAPS. This entire time, I consumed barley. My elimination process wasn’t perfect, but I still did the best I could and eliminated a lot of triggers. I stopped eating the offending rice blend, and bought new rice. Problem solved! This is a very restrictive diet, and it is hard to get elimination absolutely perfect. Try you best and do what you can.

5. Gluten free is not a savior
My experience with gluten free goods started out like an exciting new romantic relationship from summer camp: I felt carefree and happy at first, then I was kind of getting sick of it but still enjoyed their company, and then I couldn’t wait to part ways with them by the end of summer. Gluten free helps many FODMAPpers eat baked goods, pasta, and other food items again, which is wonderful. I just happen to hate the way most gluten free items taste. I’ve tried baking my own items, and I still think gluten free food is just too heavy, too dense, and too crumbly for me. I can also attest that a gluten free diet DOES NOT guarantee weight loss. I did not lose weight when I went gluten free for the FODMAP elimination, or since then. A product with calories is a product with calories, plain and simple. I was less bloated as a gluten free person, but I did not lose any weight. Also, one of the most wonderful (and yet tricky) things about being low FODMAP is that you can have gluten, just not wheat, rye, or barley. Of course, that’s a challenge in and of itself: find a wheat free, gluten filled product. I’ve had a lot of luck with spelt bread and sourdough bread. I love that I can eat a bread product again!

6. Be prepared to explain your diet to others
Many people I encountered had (and still have) no idea what the FODMAP diet was. It’s not very popular (yet!!) in the US. Many people assumed I had an allergy to dairy and wheat (I don’t), or that I had celiac disease (nope). And in explaining, I had to explain A LOT about myself and my IBS. More than any stranger or acquaintance probably ever cared to know. It helped people understand why I couldn’t eat something they’d made or that sometimes, I need to leave a restaurant immediately due to stomach discomfort. A little bit of TMI went a long way for me.

7.Try cooking
I love to cook, so I was kind of excited to cook new items and learn different ways of preparing food. It wasn’t fun all the time, but it taught me a lot about different ways to season food and how to substitute ingredients. This is a diet where you will have to cook and plan to cook (see item #2). If you’re not much for cooking, look at the things you do make and go from there. Do you enjoy making breakfast food? Start there and move to lunches and dinners. If you have someone who cooks for you, help them figure out how to cook low FODMAP so you’re more involved in the process and developing your own cooking skills.

8. Be ready to get multiple opinions from multiple professionals
I’m so thankful that my GI diagnosed me with IBS, and suggested the low FODMAP diet, but I haven’t always been this lucky with medical professionals. I had to seek out a lot of different opinions before any doctor suggested a diet change that wasn’t just “eat more fiber”. And even after working my GI, I had to seek out a dietitian to address how to challenge eliminated foods, as my GI didn’t do that. It’s OK to get different opinions, this is your health and your body we’re talking about!!! You are the only one who lives and experiences your body on a daily basis, so if something doesn’t seem right, ask questions or seek another opinion before making any significant changes.

9. If you want to cheat, do it well
I usually plan to “cheat” and eat my trigger foods. It involves planning how quickly I might have to get home, bringing my heartburn medication, planning what I eat up to cheating, and how I eat after. This holds me accountable for staying on track and staying on the diet with a few deviations here and there. In the past, I would “cheat” and then decide I might as well keep “cheating” because I’d already ruined my eating for the day. That is not a great situation for a FODMAPper, because eating poorly all day can mean flare ups for hours if not days. Don’t deprive yourself, but don’t use it as an excuse to go hog wild. Be mindful of how you want to feel for the rest of the day and week. I have had “cheat” moments where I did it well, and I’ve had MANY moments where I did it wrong, and paid the price.

10. Don’t be afraid to ask for what you want
This is something I still work on. I have a really hard time asking questions about my food when I go out to eat or go to a farmer’s market. I am afraid the server or farmer will think I’m annoying, “one of THOSE people” who probably doesn’t even have an allergy. The latter part is true, I don’t have an allergy, but I do have digestive discomfort and have a right to decide if I feel like consuming onions today or not. So ask if the guacamole contains onions, and then decide if you want to eat it. Go ahead and ask if that scone is gluten-free or if the coffee house has a nondairy milk for cream. If it has stuff you can’t eat, then you can say no.

11. Get involved!
When I started the diet, it felt like a fun, new adventure, but I also felt overwhelmed at times. I found a lot of amazing support on Instagram, Pinterest, and blogging. Meeting others who are experiencing the same challenges was really validating, and it’s inspiring to see how others are cooking and planning their low FODMAP meals. Whenever I see a great meal on Instagram, I’m always more inspired to cook. Other FODMAPpers had great suggestions for recovering from flare ups, how to cook with gluten free flours, and what dietary books to read. So join a community, get involved, inspired, and supported! You can find me on Instagram (myfoodandmymood) or Twitter (lowfodmapfood). I’d love to connect with you!

If you follow this blog and are a FODMAPper, what are some things you’ve learned in your journey?

LEAP into the void

I’ve been keeping silent on an issue that I have had for quite some time now, but after a few tests, I’m ready to share what’s going on and what changes lie ahead…

Back in November, I celebrated Thanksgiving with my family by deciding I would eat whatever I wanted, regardless of FODMAP. I reasoned that Thanksgiving comes once a year, and that it would be worth it to consume everything I’d been avoiding. After eating the meal, I had stomach discomfort, which I expected, but I also had a migraine that lasted for over 2 days, and such extreme exhaustion that I had to take multiple naps over the course of the holiday weekend. I rarely nap, so this was unusual. Basically, I felt like I was having one of the worst hangovers of my life, and I’d only consumed 1 glass of wine that night. It wasn’t normal. I believed this to be a “one time” thing, obviously having to do with consuming so much food, and so much food that I hadn’t had in several months.

But in December, it happened again. Only this time, it was more severe. I was eating Thai food at a restaurant with my friend. I picked a meal that appeared FODMAP friendly, and was happily eating, when I got a migraine. Then my tongue felt thick and heavy, almost swollen. When we got up to leave, I could barely walk straight; I practically staggered toward the door. My chest tightened up, and I wheezed my way home. This time, the migraine went away, but the fatigue stayed on for a few days, as well as stomach discomfort. I feared that being so strict on the FODMAP diet had permanently messed me up. This was when I decided to see a dietitian about my other symptoms.

The dietitian helped me re-challenge FODMAP and integrate food back into my diet. Once again, I was feeling good…but then it happened again. I was eating lunch with my co-worker, consuming food I ate on a daily basis, when my throat and chest tightened, I began wheezing, got a migraine, and my nose started running. After about 10 minutes, it was easier to breathe, but the fatigue was severe.

This has happened several more times since that last incident, and it scared me…what was going on? Was I allergic to something and didn’t know it? Was it something else? The dietitian I work with believed I was experiencing food sensitivities, along with inflammation, and suggested I complete a MRT-LEAP blood test to determine what foods I was sensitive to.

MRT-LEAP is a blood test that measures sensitivity to over 150 different food and chemical compounds, over the period of 3 days. The MRT LEAP website states: “All food-induced inflammatory reactions involve mediator release, which is the single most important event leading to all the negative effects food sensitivity patients suffer. Mediator release corresponds to volumetric changes in neutrophils, monocytes, eosinophils, and lymphocytes.” (Source: http://nowleap.com/mediator-release-testing/the-patented-mediator-release-test-mrt/ )

We finally got the results back:

MRTCARD

The 4 items in red indicate what I am highly sensitive to and should avoid at all costs, and the yellow indicate what I am moderately sensitive to and should also try to avoid.

I am a little distressed that I have to avoid mustard, blueberries, mint, peanut, rice, spinach, and solanine. I love mustard, blueberries have become a staple in my smoothies, as has spinach, and I am a peanut butter FREAK. Also, solanine is the compound in nightshades (potatoes, tomatoes, bell peppers), things that I eat DAILY.

So what does it all mean?

1. The food I’m sensitive to could be causing inflammation in my body, leading to those unpleasant symptoms I’ve had.

2. Yet ANOTHER restricted elimination diet. UGH. My dietitian is going to help me by typing up the foods I can eat for 10 days, and some possible recipes, so at least I won’t be totally on my own. But I will be doing a restricted diet through 3 phases, the duration of which is unknown.

I start the diet April 20, so I’ll be updating during each phase. I hope this helps with some things, but I’m starting to feel really frustrated that I can’t just eat what I want and I have to go through yet another thing where I’m limited to what I can have. Has anyone ever done this before? If so, what has been your experience?

FODMAP-friendly Fare

I have been working on a lot of different things in my kitchen! When it is so cold, you can barely stand to be outside, what choice do you have other than to cook??

Here are some great, EASY, low FODMAP recipes to enjoy!

Za’atar Labneh
makes 10-12 balls

labneh2

Ingredients:
2 cups full-fat yogurt (greek or regular), lactose free if you’re lactose intolerant
1 tsp. salt
za’taar spice
za’taar is a spice popular in Middle Eastern cooking. To find, peruse your grocery store’s speciality foods section, or find it here
cheesecloth or tea towel
fine colander

Directions:
1. Line the colander with the cheesecloth or tea towel. Place colander in a very large mixing bowl.
2. Mix yogurt, za’atar, and salt together.
3. Add yogurt mixture to cheesecloth-lined colander, fold edges of cheesecloth over the yogurt.
4. Put in the fridge, and leave it for 24-48 hours. You can occasionally push down on the yogurt mixutre to encourage straining, or put a heavy plate over the top of the cheesecloth-covered yogurt.
5. Your labneh is finished when it has reached a cream cheese consistency. This varies by type of yogurt. Since greek yogurt is thicker, with less whey, it will take less time to become labneh. Plain, regular yogurt will be done closer to 48 hours.
6. Remove labneh from fridge. Using your fingers, roll labneh into a small ball, about the size of a walnut. You can roll your labneh in lemon zest, more za’atar, or red pepper flakes, if you want more flavor.
7. Add labneh balls to a jar, and cover the balls with olive oil. Add a tight fitting cap to the jar, and store in the fridge for up to 2 weeks.

NOTES: Some people like their labneh sweeter. You can always leave out the za’taar spice mixture, and just use salt with the yogurt. When it is done straining, transfer the yogurt to a glass bowl and cover. This leaves it available to add honey to. Labneh can be used in many ways. It’s great on a cheese platter, it works well as a vegetable dip, it can be used for breakfast as a toast topping (either sweet or spiced). It’s very versatile!

Obviously, yogurt is not completely FODMAP free; it does contain lactose. I recommend using lactose-free yogurt, or using greek yogurt, which has a slightly lower lactose content. I also recommend using full-fat yogurt. Low or nonfat yogurt really amps up my heartburn, and so I use full-fat dairy everything. Fat is also good for you!

Mexican-Spiced Pulled Pork
serves 10

pullpork

Ingredients:
4 lbs. pork butt (aka pork shoulder), bone-in
2 cups fresh squeezed orange juice (save the oranges you use, and cut them into quarters)
1 onion, quartered
4 cloves garlic, slightly crushed
1 jalapeno, with ribs and some seeds removed, cut into quarters
salt and pepper
spice rub: cumin, chipotle chili powder, regular chili powder, oregano

Directions:
1. Preheat oven to 300F
2. Trim fat from the outer parts of the pork
3. Season pork with salt and pepper, and then rub with spice rub. Really rub it in, all around!
4. If you have time, sear the pork in large dutch oven, with about 1 tbsp of oil. If not, no biggie.
5. Add pork, vegetables, orange sections, and orange juice to a large dutch oven, and cook over medium-high heat.
6. When liquid is simmering, cover the pot and transfer it to the oven.
7. Cook, undisturbed, for 2 hours. After 2 hours, remove from oven and pierce with a fork. If fork can easily penetrate meat and/or meat begins to shred immediately, it is done. Bone-in meat tends to take a little longer to cook. I cooked mine for 2 hours and 30 minutes.
8. Transfer pork to a large mixing bowl, leaving liquid in the dutch oven. Using two forks, shred meat away from bone and remove additional fat. Once all meat has been shredded, remove the bone and fat.
9. Slowly add cooking liquid to the meat, moistening it to your preference.

It seems like a lot of steps, but this is one of the easiest things I’ve made in a long time. I used this recipe for pork carnitas, but I think it would be good for pulled pork sandwiches, mixed into macaroni and cheese, and I’ve been thinking about making a stuffed pepper pulled pork concoction….
NOTES: If you prefer to use boneless pork, cut it into large 2-inch sections before putting in the dutch oven. Some pulled pork recipes recommend blending the vegetables and liquid after cooking, and using that to moisten the pork, but then it wouldn’t be low FODMAP.

Banana Split Sundae
serves 1-2

bananasplit

Ingredients:
1 cup frozen pineapple
1 cup frozen strawberries, broken into small pieces
1 frozen banana, broken into small pieces
1 tbsp. natural peanut butter
maple syrup or honey
non-dairy or non-lactose milk of your choice (I used coconut milk)
sundae toppings (shredded cococnut, chocolate chips, sprinkles, nuts, etc)

Directions:
1. Add frozen pineapple to food processor. Pulse, slowly adding milk until you get a soft-serve consistency. Add pineapple ice cream to bowl, set aside.
2. Add frozen strawberries to food processor. Pulse, slowly adding milk until you get a soft-serve consistency. Stir in maple syrup until you get to your desired sweetness. Add strawberry ice cream to the bowl with pineapple ice cream. Set aside.
3. Add frozen banana and peanut butter to food processor. Pulse, slowly adding milk until you get a soft-serve consistency. Stir in maple syrup until you get to your desired sweetness. Add banana peanut butter ice cream to the bowl.
4. Top with sundae toppings, and enjoy!

There you have it: appetizer, dinner, and dessert, all low FODMAP! FODMAP cooking’s greatest blessing, and at times, curse, is that you have to be creative with your cooking. I’m curious how others stay low FODMAP and creative, share in the comment section below!

Shamrock Fake

It’s that time of year again…the time when McDonald’s rolls out their glorious Shamrock Shake! This has been a long-awaited happiness that I have every year. Some people look for a robin to indicate the first sign of spring, I look for Shamrock Shakes. This year, the happiness has turned to sadness, because the Shamrock Shake is anything but FODMAP-friendly. I don’t even know what it’s in it, but I saw “Supersize Me” and I know that whatever it is can’t be good. Despite the fact that my lactose challenge is going well, that doesn’t mean that the Shamrock Shake is appropriate. Is it made of milk? Cream? Ice cream? Ice milk? Whatever chemical McDonald’s has to make ice cream? Who knows??

This led me to try to attempt my own, FODMAP friendly version of the Shamrock Shake, known affectionately as the “Shamrock Fake”. It comes pretty close! I alternated creating and testing this with drinking the real Shamrock Shake for comparison. I got sick later, so it’s further proof that the original isn’t made for FODMAPPERS.

Shamrock Fake
image
makes 1 generous serving

Ingredients:
1 frozen banana
2 tsp. vanilla extract
1/2 tbsp. pure maple syrup
1 can of full fat coconut milk (14.5oz), with coconut cream and liquid separated
OR 8 oz boxed coconut milk and 1 can coconut cream
Leaves from 1 mint sprig
1 handful of spinach

Directions:
if using canned coconut milk:open coconut milk can and separate the liquids from solid. I used a spoon to scoop out the solid cream. Put solid cream in a container and chill in the fridge. If using boxed coconut milk, put can of coconut cream in fridge for 1 hour.
2. Add banana, vanilla, maple syrup, liquid coconut milk, mint, and spinach to blender.
3. Blend, on high for 2 minutes, then set blender to “liquefy” and blend for an additional 30 seconds. This really helps blend in the mint and spinach.
4. Using a hand mixer, stand mixer, or a whisk, whip remaining coconut milk solids until soft peaks form.
3. Put mint shake into glass, top with whipped coconut milk, and enjoy!

Notes: You may need additional liquid to facilitate blending. Coconut water works well, just add small amounts at a time until it reaches the desired consistency. You can also use any liquid, dairy or non dairy. I prefer coconut milk over almond milk because it’s creamier, especially from the can.
Coconut milk from the can is much fattier and will increase fat and calorie content. If this is a concern for you, use boxed coconut milk for the liquid and use canned coconut cream for the whipped cream.

Enjoy the first sign of spring with your own Shamrock Fake! This would also make a great treat on St. Patrick’s Day.

Snack Easy

I try to make my weekly snacks on Sunday, so I’m not tempted to buy a candy bar or cookie from the cafeteria in my building. These raw, peanut butter cookies fit my snacking needs perfectly!

Need #1: Will tame sweet tooth

Need #2: Satisfying, won’t leave me starving

Need #3: Not completely sugar-filled (although sometimes that’s a need!)

Need #4: As FODMAP-friendly as possible

Raw Peanut Butter Cookies

peanutbuttercookies

Inspired by Sweetest Kitchen

makes 24 cookies

Ingredients:
1/2 c. almond flour/meal
1/2 c. coconut flour
1/2 c. natural peanut butter (or any nut butter you prefer)
1 tsp. vanilla extract
1-2 tbsp. maple syrup
1/2 tbsp. coconut oil
1/8 c. unsweetened, shredded coconut
1 tsp salt
1-2 tbsp. water

Line a food storage container with parchment paper. Add all ingredients, except water, to a food processor outfitted with a “S” blade. Pulse several times, then blend for roughly 2 minutes. While blending, a sticky dough should form, and create a dough ball in the processor. If your dough is still mealy, add water, 1 tablespoon at a time, while blending. Once the dough has become sticky or to your desired consistency, stop blending. Using a tablespoon, scoop out some dough and roll between your palms until it creates a firm ball, about the size of a melon ball. Put ball on parchment paper in container, and make crosshatch pattern with a fork, pressing down to your desired thickness. Repeat until all the dough has been made into “cookies”. Enjoy!

*Notes: The original recipe called for 1 c. almond meal, and several dates. As dates are not low FODMAP, I omitted them and added coconut flour, coconut oil, shredded coconut, and water to help thicken the dough. Using dates would eliminate the need for extra thickeners.

What low FODMAP things do you snack on? How do you plan for your week ahead?

Stir Fry Crazy!

Stir Fry is a great recipe for the low FODMAP individual. With the variation of protein, vegetables, and sauces you can use, almost anything can be modified to fit the diet. Making stir fry is a good way to get a few servings of vegetables, too! I used to love this amazing sauce from Cooking Light, but it had honey and garlic in it, and I stopped cooking with it for a while. I decided to modify the sauce and it was almost as good as I remembered! Try it on your own stir fry, you won’t be disappointed!

Low FODMAP Stir Fry and Sauce

stirfry

Serves 6

1/2 red bell pepper, diced
1/2 yellow bell pepper, diced
4 carrots, diced
1 cup green beans, fresh or frozen
1 cup broccoli florets*
1 cup frozen edamame*

Sauce
1 garlic clove, slightly smashed
1 tablespoon scallions (green part only!), chopped
1 teaspoon of vegetable oil
1 tablespoon fresh cilantro
2 tablespoons tamari
2 teaspoons fresh ginger, chopped, or 1 teaspoon of ginger spice
1 1/2 teaspoons brown sugar or coconut sugar
1 1/2 teaspoons dark sesame oil
1 1/2 teaspoons maple syrup
grated lime rind
juice from 1/2 of lime
2 squirts sriracha, optional

Directions: Saute garlic clove and about half of the scallions in vegetable oil over medium heat for 2-3 minutes, making sure the garlic doesn’t brown. Remove garlic from pan, reduce heat to low. Add vegetables, and saute for 15 minutes at medium low heat, until most of the vegetables have softened and are turning brown. In the meantime, combine remaining scallions, cilantro, tamari, ginger, sugar, sesame oil, maple syrup, lime rind,lime juice, and sriracha in a blender. Blend until well combined. Pour sauce over vegetables and cook on low for 5 minutes, stirring freqently, until sauce has thickened and reduced slightly. Serve with rice or gluten free noodles.

Some notes: Broccoli and edamame are items that most FODMAP food lists encourage to eat in low amounts, or not eat at all. I cannot tolerate either of these items, but add them for my husband.

Recently, I made brown rice with turmeric, and the added spice was delicious! When making rice, simply add turmeric to your liquid, rice, and simmer. This recipe is also delicious with coconut rice!

Back to the Beginning

After experiencing so many flare ups recently, I decided to visit a dietitian to go over FODMAP and get their recommendations. When I initially started the FODMAP diet, it was under the guidance of my GI, who was helpful in getting the diet started, but I felt I needed more guidance in reincorporating food. I figured a dietitian could give more specific advice and be more available than a GI.

The dietitian’s first recommendation was to complete the FODMAP elimination again, for 2 weeks. Sigh. I am a little disappointed by this, but 2 weeks is better than the first go-around, which was 8 weeks! In preparation to start the full diet again (starting January 5), I decided to make a few things ahead of time, so that way if cravings strike, I’m ready!!

Almond Flour Coconut Flour Pancakes
adapted from this recipe from Against All Grain
serves 4-6 (2 pancakes apiece)

pancakes

Ingredients:
3 large eggs, at room temperature
1 overly ripe banan, mashed
¼ cup almond milk
1 teaspoon vanilla
1 teaspoon maple syrup
2 tablespoons coconut flour
â…“ cup almond meal
½ teaspoon baking soda
¼ teaspoon salt
¼ cup dark chocolate chips
Butter or coconut oil for the pan

Instructions:

1. Mix together the wet ingredients and mashed banana, beating well until the eggs are beaten and slightly foamy.
2.Combine the dry ingredients in a separate bowl, then incorporate them into the wet. Whisk well until well combined; almond meal can be quite grainy so really beat well in order to smooth the meal. Let mix sit 3-5 minutes to let the coconut flour soak up some of the moisture
3. Heat a skillet over medium high heat or use a griddle. Mix the batter again, then begin making your pancakes.
4. Oil the pan with coconut oil or butter, then pour about a ¼ cup of batter per pancake. Add chocolate chips to the top of each pancake, and using a spoon, slightly push them into the pancake to be slightly covered by batter
5. Cook pancakes for about 6 minutes, then carefully flip the pancake over, and cook for another five minutes until the pancake has fluffed up an feels slightly firm
6. Keep hot in a warm oven until you are done making the remainder of the pancakes

I like to put mashed banana in gluten-free pancakes, because it makes them moister. I ate several pancakes and then froze the rest for breakfast at another time.

Gluten Free Snickerdoodles
adapted from this recipe from Beard & Bonnet

snickerdoodle1

Makes 24-32 cookies

Ingredients:

2¾ cups gluten free all purpose flour (I used Pamela’s Gluten Free Flour)
2 teaspoons baking powder
½ teaspoon salt
1 cup coconut oil, solid
1/2 cup coconut sugar, plus two tablespoons
1 cup white sugar
2 large eggs
3 teaspoons ground cinnamon
1 tablespoon vanilla sugar

Instructions
1. Preheat the oven to 350°F
2. Whisk together flour, baking powder, and salt into a bowl.
3. Place the coconut oil, 1/2 cup coconut sugar, and 1 cup white sugar in a bowl and mix with beaters or electric mix on medium speed for 2-3 minutes
4. Add the eggs and mix well. Reduce the speed to low; gradually add the flour mixture a ½ cup at a time until incorporated completely
5. Stir together the cinnamon, vanilla sugar, and 2 tablespoons coconut sugar in a bowl
6. Shape the dough into small balls using a tablespoon
7. Roll in cinnamon sugar and place on baking sheets lined with parchment about 1½ inches apart from one another.
8. Bake the cookies, rotating sheets halfway through, until edges are golden, 12-15 minutes.
9. Let cool on the sheet pans for about 7 minutes, then move to wire racks.

Notes: Gluten free flour can dry up quickly, so use as many cookie sheets as you can to prevent drying time between cooking. My mix became too dry to use by the last batch, so I couldn’t make all the cookies! You can freeze these cookies for up to 1 month. In my experience, all gluten free baked goods should be frozen in order to maintain texture of the product.

Wish me luck on this next elimination!

New Year, New Resolutions

I started this blog 1 year ago, as a way to keep track of my digestive issues, what I was eating, and my moods. I wanted to see if there was any connection between what I ate, and how I felt. I thought being on the brink of 2015 would be a good time to reflect on the blog. Below, my absolute goal for 2014:

I’m hopeful that by limiting starch and refined sugar, I’ll feel better, both physically and mentally. I am tired of feeling stressed and angry. Even if things in my life aren’t going well, I’d like to be able to take pride in the way I care for myself, and eating more healthfully will hopefully uplift my spirits and give me something to feel good about

NAILED IT. No seriously, I did! I feel so much better about myself. I changed my diet, and I changed my mood. The food didn’t necessarily change anything, it was the idea that I prioritized myself, put my health first, and stayed the course, no matter what life threw at me. I continued to try to eat well, exercise, and I saw my confidence soar. When I eat healthier, I feel happier. The FODMAP diet has reduced many dietary symptoms that I found upsetting or painful, which has improved my mood on a consistent basis. I feel much happier living without the daily issues of stomach pain and bloating. I may still get depressed or anxious, but I don’t let it derail my efforts to take care of ME!

new-year-2015-Resolutions00
image courtesy of Happy New Year Whats App

I started thinking about resolutions, about how this all started as a resolution of sorts; attempting to keep weekly notes on my health. I had never done that before, and it thrills me that I was able to mostly keep that going. After doing this, I realize that resolutions should be just beyond what you’re already doing; go too far, and you’re likely to quit. Don’t push yourself enough, and nothing changes.

In therapy, I frequently help people make changes in their lives, and the clients who often have the most success are those who make realistic goals for where they are at in their life at that time. When you experience success, you’re more likely to stay motivated to maintain the change and build on it. Experience failure, and it becomes demotivating; why change if it won’t work? The idea is to set the bar slightly higher than your present, and keep reaching from there. I applied the ideas that I use with clients to myself. It worked for me to attempt to keep track of this blog weekly/consistently, as opposed to daily. I also resolved last year that I would read more, and instead of keeping it vague, I joined a virtual book club with my friends, where we read 1 book every 8 weeks, which was much more achievable than 1 book each month. Resolutions should also be specific. Vowing “I will exercise more” may not be enough to keep you motivated, where was resolving to “exercise 3 days each week” gives expectations.

What will my resolutions be for 2015? Take a peek….

1. Eat 3 servings of vegetables daily

I presently eat at least 1-2 servings of vegetables each day, depending on how much spinach goes in my morning smoothie. Beyond that, all bets are off. I could eat 5 servings each day, or just 1. As a person with IBS and who eats low FODMAP, it’s really important to gain fiber from other sources outside of grains. I slip on this a lot; most of my snacks consist of FODMAP-friendly fare but that doesn’t always mean it’s that healthy!

2. Use planner daily

Organizing is not a strong trait of mine. At work, I find organizing to be easy and necessary. When I get home, the last thing I want to do is organize, and yet it is necessary. I’m hoping that by using a planner, I can keep track of projects, deadlines, and my “to do” list, which is often just floating around in my head or jotted down on scraps of paper.

3. Cook meals 3x per week

Cooking is a passion of mine, and yet I’ve neglected it A LOT this year. When I started the FODMAP diet, I felt frustrated by all the limitations and my passion for cooking dwindled. Cooking is my stress reliever; it’s incredibly rewarding to create a delicious, soul-filling meal from my own kitchen. It’s also like a big chemistry experiment to me, which is fun!

I also plan to keep reading and keep up this blog. I’m going to continue to exercise using TONE IT UP, a plan that has different daily workouts, contests, and schedules to keep things interesting! I have been participating in their program since September and I love it.

I’d love to hear what some of your resolutions are! Wishing all of you an amazing and healthy 2015; I hope it’s your best year yet!